How to Use Custom Fields for Efficient Inventory Management
May 19, 2021
Most inventory apps come with several predefined fields to facilitate inventorying. Some of the most common fields are Name, Type, Quantity, and Price. Standard fields make inventory management solutions easy to use. If your current inventory app is not working as expected, you can switch to another and get the benefits it offers without having to endure a steep learning curve. However, businesses have unique preferences. The fields that work for one warehouse may not work for another. As the inventory manager of your enterprise, you need a solution that can adapt to your needs, rather than force you to work with what it offers.

Custom fields make it possible for you to add more data points to your inventory dashboard. Therefore, you can track your items based on more specific information, such as supplier and customer names, phone numbers, email addresses, and website links.
Custom fields also give you more sorting options. With Britecheck, for example, you can add key dates like expiry dates and last purchase dates as additional fields. So, in addition to sorting your items by name, quantity, and price, you can also list your products from the first to the last item you purchased within a period.
Using Britecheck to Create Custom Inventory Fields
The Britecheck inventory management app has recently added Custom Fields to its ever-growing list of features. If you were feeling rather restricted by the standard Britecheck fields, you now have a reason to smile. By creating custom fields, you can expand your inventory dashboard to cover various trackable data sets, depending on your needs.
Follow the steps below to enjoy the convenience of Britecheck’s custom inventory fields.
1. Log in to Britecheck
Go to Britecheck.com or the Britecheck app on your mobile device and log in to your account.

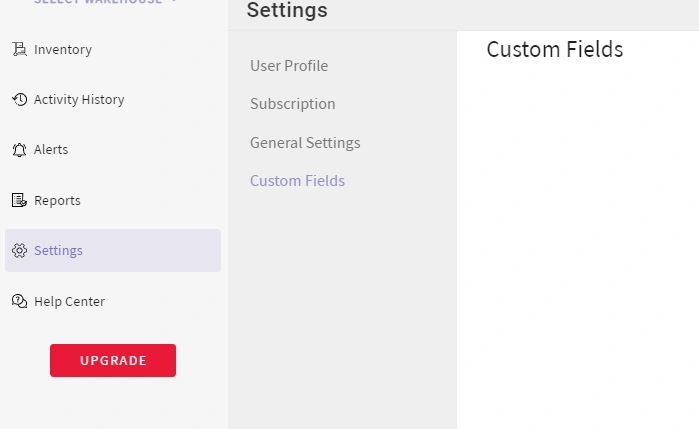
2. Go to Settings
In the Britecheck web or mobile app, click on the Settings section. There, you can find options to change your personal information and pricing plan, tinker with general settings, and add custom fields. Click Custom Fields.
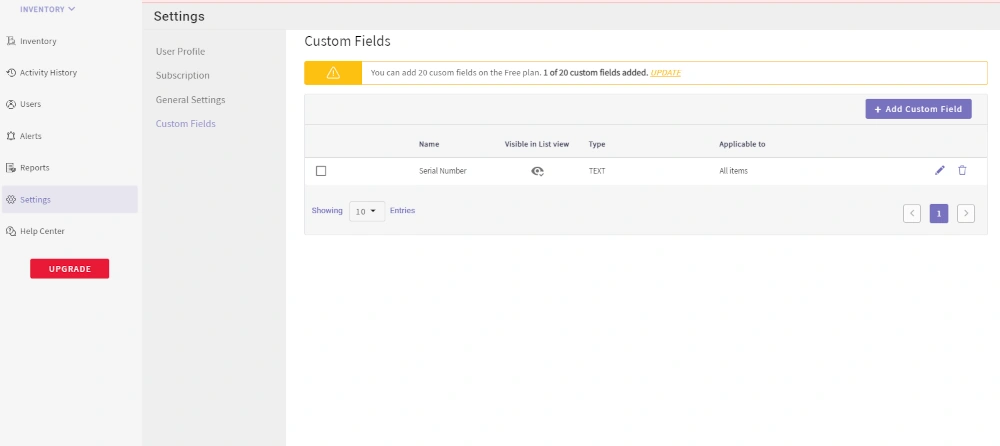
3. Click Add Custom Field
To create a new custom field, click the Add Custom Field button. In the future, you will be able to see all the custom fields you create when you get to the Custom Fields sub-section in Settings. In the screenshot below, the custom field “Serial Number” has already been added.
4. Choose a Custom Field Function
Clicking the Add Custom Field button reveals ten different options to choose from, depending on the functionality you want for your custom field.
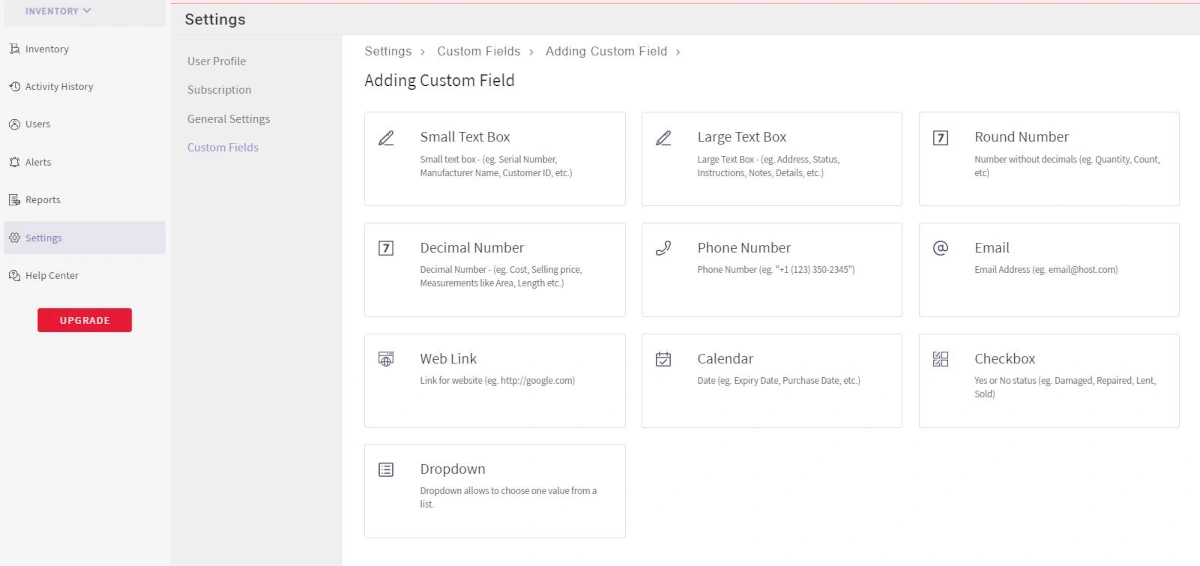
Below is a description of these options and how they can fit into your inventory dashboard
- Small Text Box - allows you to add an additional field with data represented in a few alphanumeric characters. You can use this option to include details like an item’s serial number or its specific storage location.
- Large Text Box - enables you to add a custom field with data represented in a few words. Large text boxes are best reserved for details like Supplier Names, Street Addresses, and Notes.
- Round Number - allows you to add another field of numerical data. You can use this field for information like safety stock and re-order level.
- Decimal Number - serves the same purpose as the Round Number field option, but also allows you to represent data in decimal numbers.
- Phone Number - Allows you to add the numbers of suppliers, customers, or even the staff members in change of particular inventory items as data sets.
- Email - enables you to include the email addresses of item suppliers, customers, or support staff on another field in the inventory dashboard.
- Web Link - can be used to add a direct link to a webpage with more information about the product, or to a supplier website.
- Calendar - allows you to include a calendar field to your dashboard, particularly to aid in sorting. With this field, you can sort your inventory based on specifics like Expiry Dates, Purchase Dates, Expected Delivery Dates, and Expected Stockout Dates with a single click.
- Checkbox - provides the change to add Yes or No parameters to your dashboard. You can then sort or filter your information into items that have a Yes or No on parameters like “in stock”, “running out”, or “damaged”.
And lastly,
- Dropdown - allow you to add a list of potential answers to specific questions.. When adding an inventory item, this custom field can give you the option of saving the dropdown answer as a dataset. For example, you can include a dropdown list of price ranges for quicker price-based sorting and filtering.
5. Add a Description
Once you have chosen the functionality that best suits your new custom field, click on it to add a description.
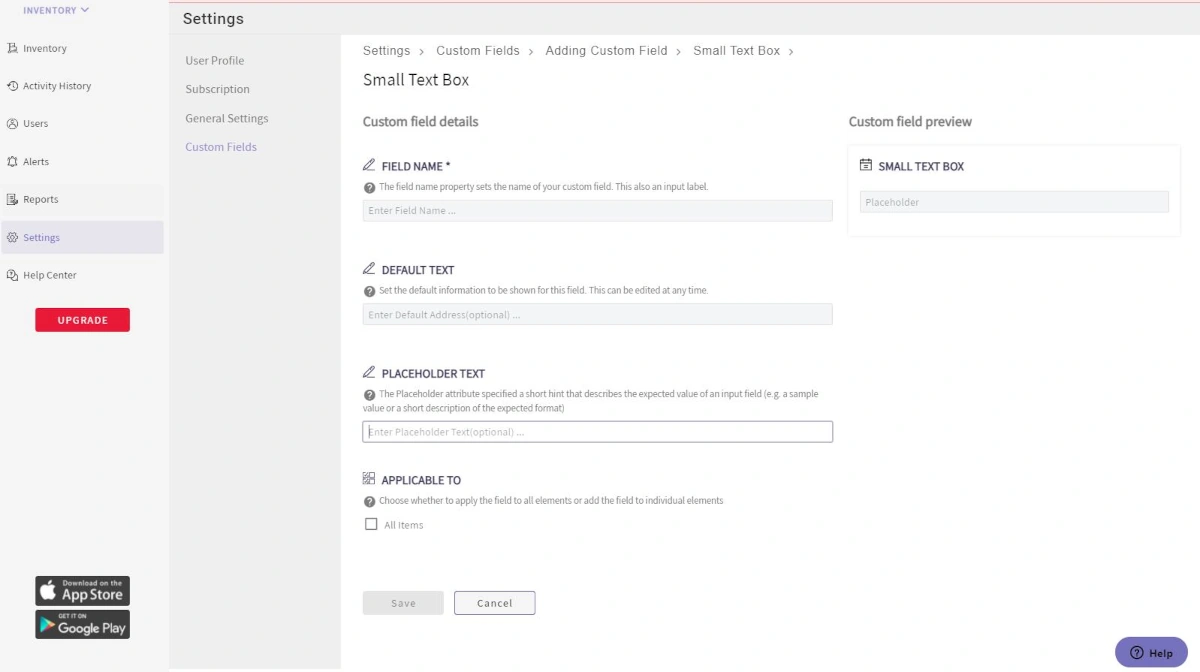
Britecheck allows you to describe your new field using a custom name. This name becomes the
field’s label on the inventory dashboard.
As part of the description, you can also add any information you would want the field to
display by default and a placeholder word to describe the input expected in the field.
Finally, Check the “Applicable To” checkbox if you want the field to apply to all inventory
items, or leave it blank to add it to individual items.
6. Save your Custom Field
After completing your custom field’s description, click the Save button. Your new custom field will be fully implemented and ready for use.
7. Add Custom Fields to Items
Now that your custom field is saved, head over to the Inventory section. If you want to add the custom field to an existing item’s description, click the Edit icon on the particular item.
Then, click Add Custom Field, choose the field you want to add to the item, and click Save.
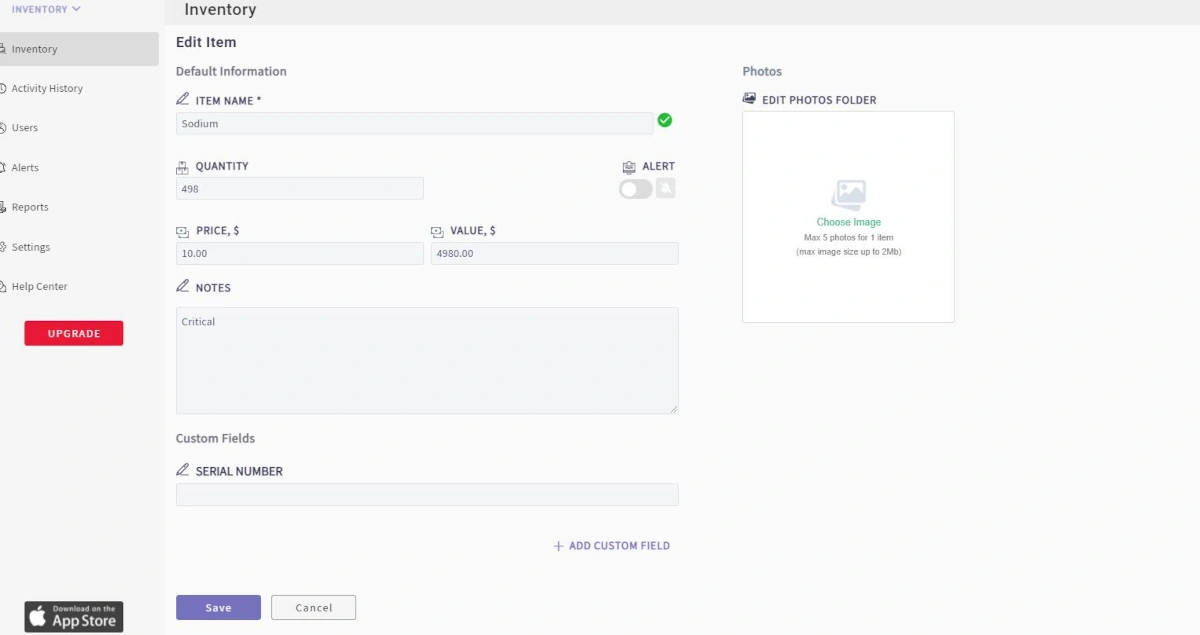
The item will be saved with the new field.
How Many Custom Fields Can You Add on Britecheck?
Currently, the Britecheck app offers up to 20 custom fields with the Business Plan and unlimited custom fields with the Company and Corporate plans. As with all features, you can bump up the number of custom fields at your disposal by upgrading your plan anytime. If you are in need of an inventory app that offers custom fields for efficient and accurate tracking, Britecheck is the solution for you. Sign up for a free trial and take this feature for a spin!